Stitch Along: my Stitched rainbow
Getting Ready: Day 0
100 days projects are an amazing way to learn something new. Last year I drew 100 flowers and full disclosure I haven't finished that project yet. I've gotten to about 85 flowers and I will keep plugging away at that over time. You can search Instagram tags for #shedrew100flowers to have a look at that project
For this project, I invite you to stitch along with me. I'll be using the '100 Embroidery Stitches" by Anchor Embroidery Stitches. Printed in 1989. You may be able to find a copy in a second-hand store somewhere but to do this project all you need are a list of the stitches. :) I'm going to put all these stitches in the shape of a rainbow. This could get interesting when I get to the drawn thread stitches but I'm game!
Today is about getting all your materials in order. You can use the same things as me or just use what you have.
Follow my Pinterest account for stitch links. I've set up this board just for embroidery stitches and I'm making sure there is at least one link to how to do each stitch in there. Of course, you can just google or youtube each stitch, there is a wealth of knowledge online.
Use the Hashtag #mystitchedrainbow to share your project with others. That's where I'll be sharing my rainbow as I stitch it up on Instagram.

Stitch along rainbow embroidery
Materials

Embroidery hoop, scissors and thread
What you'll need
Fabric (Your Choice) - I'm using white linen
Needle (Your Choice) - DMC Needle guide
Thread (Your Choice) - I'm using up a pearl size 12 in white.
Scissors
Marker (Or freestyle it)
Embroidery hoop (Or if you are in lockdown try freestyling it)
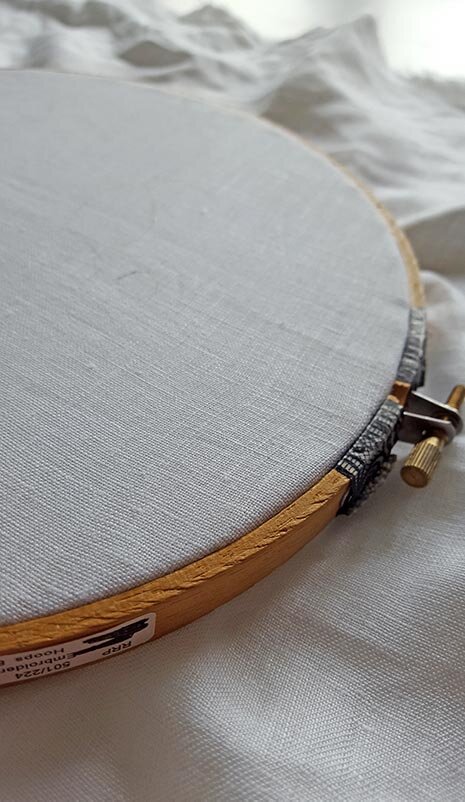
Stretch your fabric in your hoop
An embroidery hoop is a round piece of wood, plastic or metal used to keep the fabric tight. There are 3 parts in almost every hoop: outer hoop, inner hoop and a screw.
To place the fabric in the hoop, Unscrew the hoop and separate both parts, then place the fabric between them. Tighten the screw and pull and adjust the fabric until you have a good surface and you are ready to stitch!
I'm using a piece of white linen that I found in my stash. It's a little looser weave than I normally like to stitch with so perfect for a random project :) My hoop is bamboo. I've also wrapped the metal parts so they don't catch on my fabric and I've bound my inner hoop. Here is a great tutorial on how to prepare a hoop for stitching By Mary Corbet
tips for stretching your embroidery fabric in a hoop
Draw your pattern

draw your rainbow pattern
For this project, I'm using my disappearing ink pen. I picked this up from spotlight, NZ. I find it useful for projects that are quick. The line can and will disappear spontaneously which can keep things exciting!
You can also just use a pencil, pen or just make it up. I find when trying to learn an embroidery stitch a line to follow can make a big difference.
Knot your thread - do this however you like but maybe today is an opportunity to learn a Quilter's knot if you haven't tried one before.
Instructions for Quilters knot
I'm starting at the inner arch of my rainbow. Draw your line on when you are ready to stitch.
See you tomorrow for our first stitch
If you have any questions DM me on Instagram or contact me here.

selection of embroidery books
